

In this article I’m going to discuss how to create a form in HubSpot and use them effectively. I’m also going to show you a few examples that I’ve created for my clients.
What is a form in Digital Marketing?
A form is a field (or a group of fields), the main purpose of which is to capture people’s information. The idea is when somebody fills in a form, the information goes directly to the CRM, in our case – Hubspot, so that marketers can analyse this data and then nurture these people accordingly.
When visitors submits a form, they became leads. The end goal is to convert leads to customers. Though, forms can also be used for leads and customers to know more about them, it can be a questionnaire or a review of a product.
How to create a form in HubSpot
In Hubspot to create a form go to the menu, click on Marketing – Lead Capture – Forms (for Hubspot Marketing Pro and Enterprise) and Marketing – Forms (for Hubspot Free and Starter).
Then click on Create form button as you see in the below screenshot.

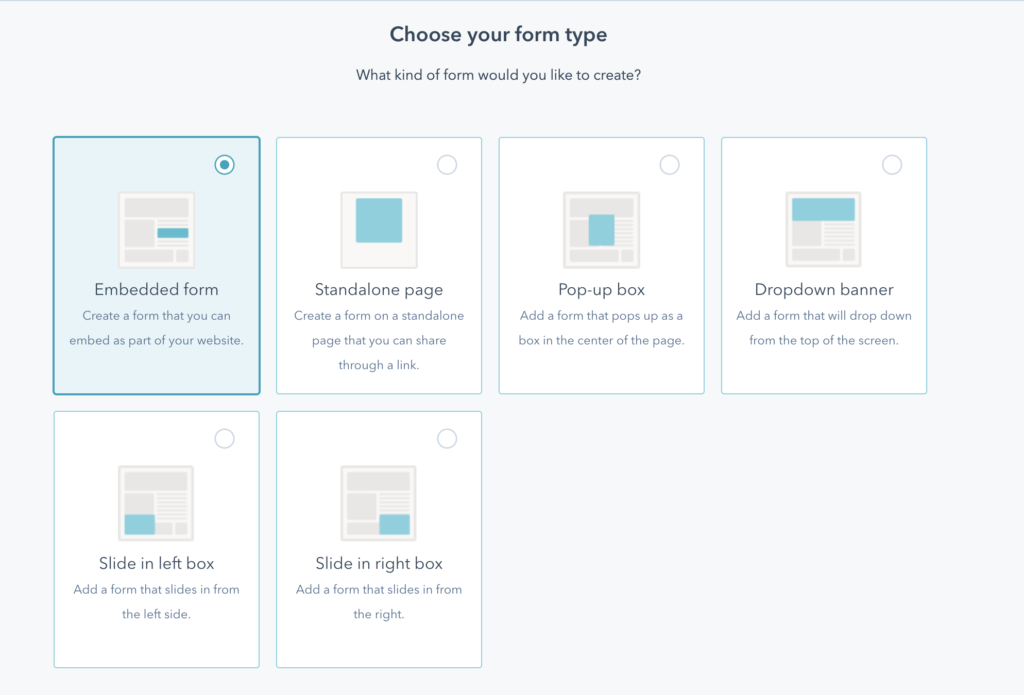
After clicking the button, you’ll see different types of forms in Hubspot. Let’s consider all these types, so that you have a chance to choose the right one.
Form types in Hubspot
- Embedded form—This form type is usually created to insert directly into your website page. With the help of embedded code, you can put this form in a website footer, sidebar, or between your content.
- Standalone page—Hubspot will create a separate page URL that you can send directly to your contacts. You can also insert this URL into your blog and social content. It works quite well when you think it makes sense to send the form only so that nothing interrupts your contact from filling this form.
- Pop-up Box – the pop-up banner will appear in the middle of the page, covering everything on it. That’s one of the best ways to attract attention, though be careful, sometimes using this form can make your visitors nervous because of interrupting from reading your actual content. In HubSpot, you will have the ability to set up the appearance of this form based on page scrolling, time spent on a page, or exit intent.
- Dropdown Banner – the banner appearing at the top of the page (full width). It’s suitable for some announcements or contests. In this form type, you’ll not be able to use an image, just plain text.
- Slide in the left box & Slide in a right box is another pop-up type of form that arises in the bottom corners. You can choose a side of a page. This form can also appear based on criteria set up by you: page scrolling, time spent on a page, or when a visitor is going to leave this page.
What I also want to stress is that if a visitor declines a pop-up form (click on the cross), it will not appear anymore for some time. On the other hand, if a user ignores a form, it will appear till the action is done (either declining or submitting).
Choosing Form Templates
After you’ve chosen a form type, HubSpot suggests you choose a template (based on a form type, templates can differ). In my example, I chose the embedded form.
The Form Templates are not fixed; they are just a starting point for your form. Feel free to customise a template based on your needs. You can also choose a blank template to create a form in HubSpot from scratch.
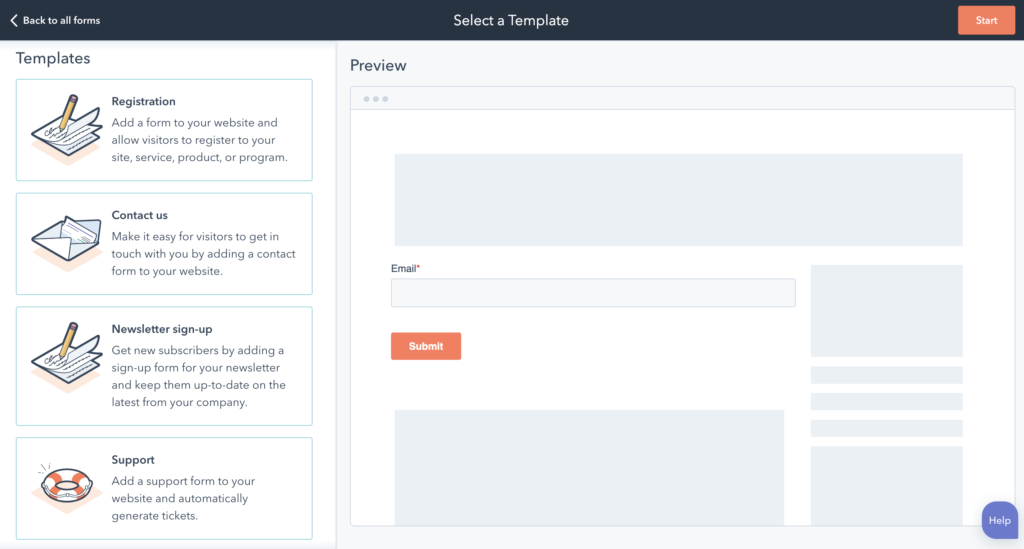
I intend to choose a Newsletter sign-up form. To do so, just choose the left-side Template and click on Start at the top right.
In the window, you will see your form. On the left, you can choose the existing properties and add them to your form on the right side of the screen. Choose a tab, Create New, if you want to create a new property from this screen. It’s a user-friendly approach: Instead of going to Settings—Properties, you can just create a new property fast here.
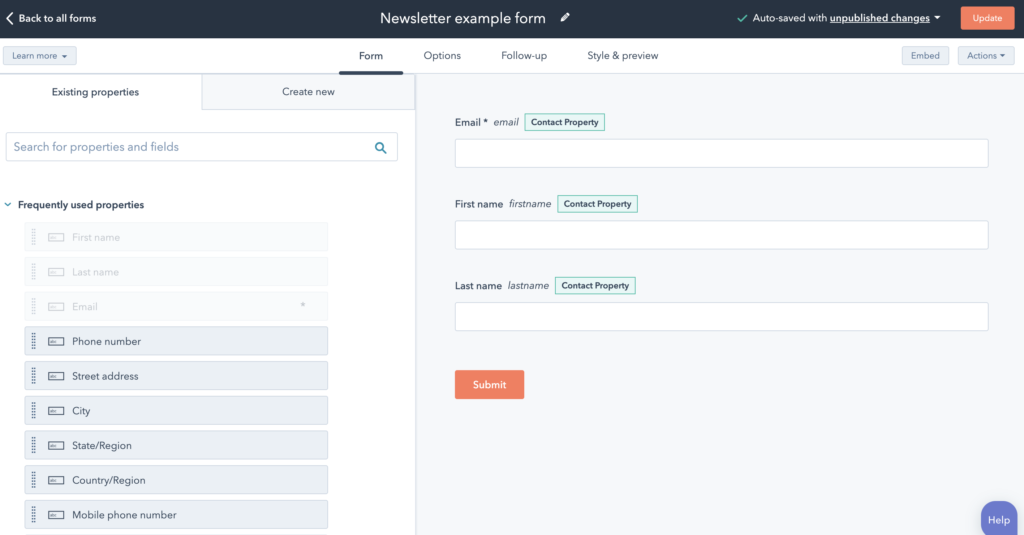
The Email Field is King in HubSpot; without knowing the Contact’s email, workflows, email campaigns, etc., it will not be possible to use the Software. All other fields can be ignored in terms of technical use.
Of course, it’s better to know the First Name of the contact as well so that you can personalize your campaigns. Conventional wisdom says that the more information you know about your contacts, the better.
Although speaking about the Newsletter form, I don’t recommend using many fields. As a Subscription is usually just the beginning of a Funnel, visitors are usually not ready to provide much information about them. And all people are also lazy:) Remember that when you become a Subscriber, you are requested to fill out a long form; what do you do? I think just ignored this form:)
So, I recommend using one or two fields at this moment. For my website Velainn, I’m using Email and First Name fields for a Newsletter Form.
Okay, go to the Options Tab.
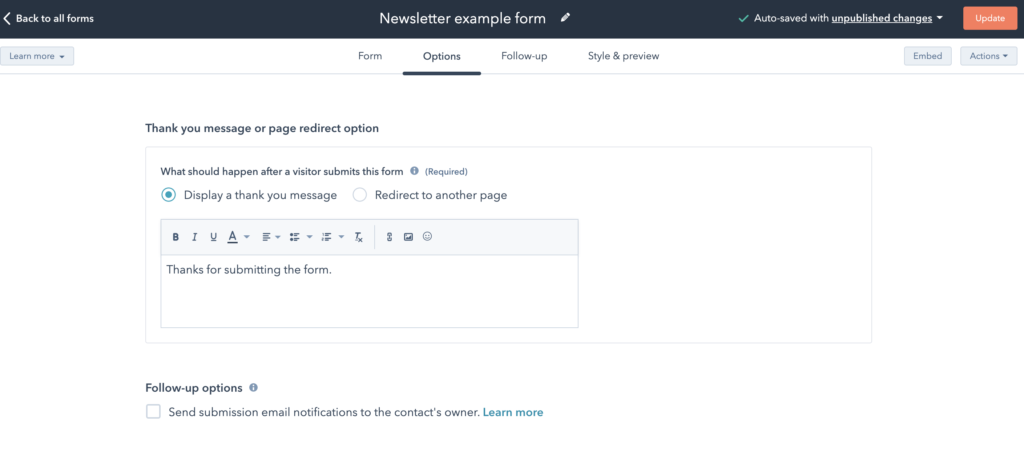
In this Tab, you can choose either a Thank-You message or a Thank-You page after a visitor has submitted a form. It’s up to you what to choose. A thank-you page is a good option, too, as part of a Funnel. Just don’t forget to create an excellent thank-you Page in advance. Then, just put a link to this page in the Options Tab.
In the second part of the Options Tab, choose an email home to which to send submissions and a language. These parameters are usually set by default.
Other submission settings
Always create a contact for a new address – click on or off.
Set contacts created as marketing contacts—if turned on, these contacts can be used for marketing activities: email campaigns, workflows. Click on, but don’t forget to check your Hubspot tier. Marketing contacts are a paid option, and the total monthly or annual Hubspot price is also based on the number of Marketing Contacts.
Add a link to reset the form – I usually turn it off.
Pre-populate contact fields with known values—if turned on, the values will be overwritten by known values, but the default values will not be overwritten. If you need more info, you can read the tutorial. I usually leave this field by default.

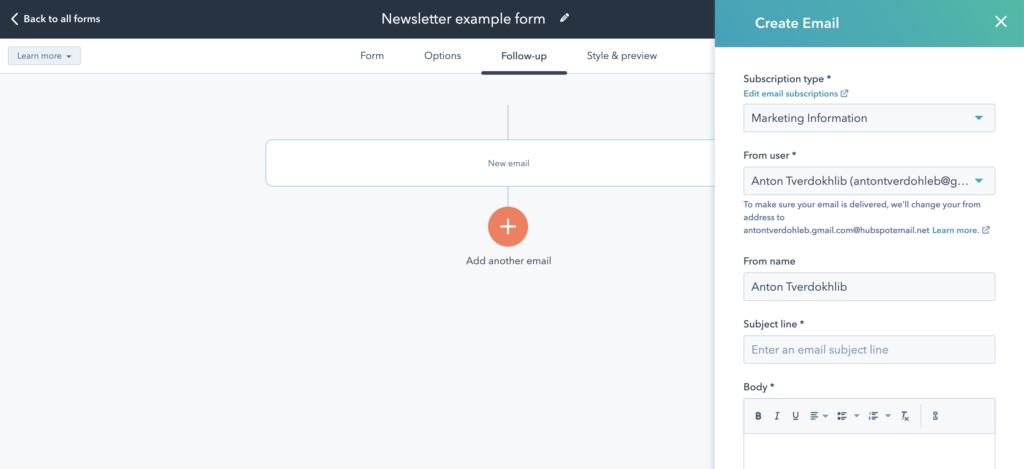
In the Next tab, called Follow-Up, you will have a chance to create a simple automation. In the Hubspot Free Package, you will be able to create a single automated reply to the contact who submitted a form. You can use it as a Thank-You message as a first touch with your contact. Which is great—you’ve started engaging your Subscriber right away!
In Paid Hubspot Tiers, you can set up more messages here to send automatically.
In the Style&Preview Tab, you can style your form based on your company’s corporate styles. Make bigger / smaller buttons, change colors, width, and other parameters so that the form looks good on a website and is aligned with your branding.
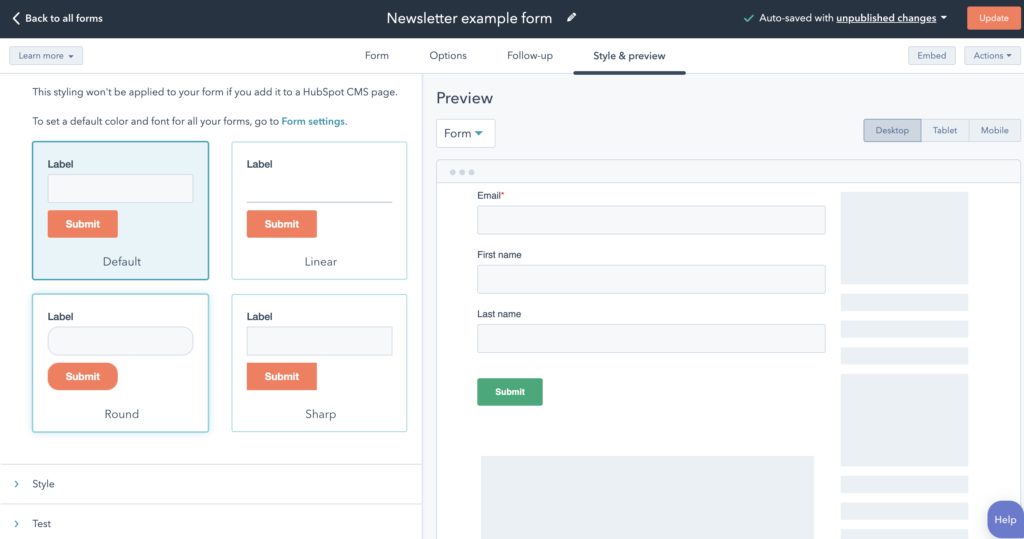
After styling your form, test how it looks on Desktop, Tablet, and Mobile devices.
When it is ready, click on Update at the top right corner, and we’re done! You can then click on Embed, copy the embedded code, and insert it into your website!
No worries. If a form doesn’t suit your website well, you can customise it and update it again. Your form will be updated at Hubspot and your website as well.
If you need any help creating and incorporating Hubspot forms into your website, Contact Velainn. We’ll be happy to help.